Building Your First Flow
✨ Learn to build this flow in less than 5 minutes!
Our Mission: Store form submissions in SharePoint and upload the attached file to a SharePoint document library.
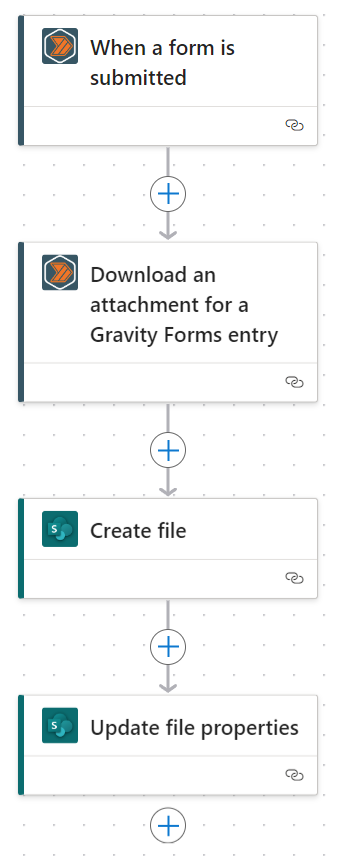
In this tutorial, you'll learn how to build your first flow with Gravity Forms Power Automate Professional. This simplified example will show you how to create a flow that triggers when a form is submitted, and then sends the form data to SharePoint and uploads an attached file to a SharePoint document library.
This tutorial assumes you have a basic understanding of Power Automate and Gravity Forms. If you're new to Power Automate, you may want to start with the Power Automate documentation. If you're new to Gravity Forms, you may want to start with the Gravity Forms documentation.
The example flow that we are building in this tutorial fulfills the following business requirements:
- When a new form is submitted, send the form data to SharePoint.
- The attached file is uploaded to a SharePoint document library.
- The associated information is stored in columns with the attachment.
Our example environment has been set up with the following:
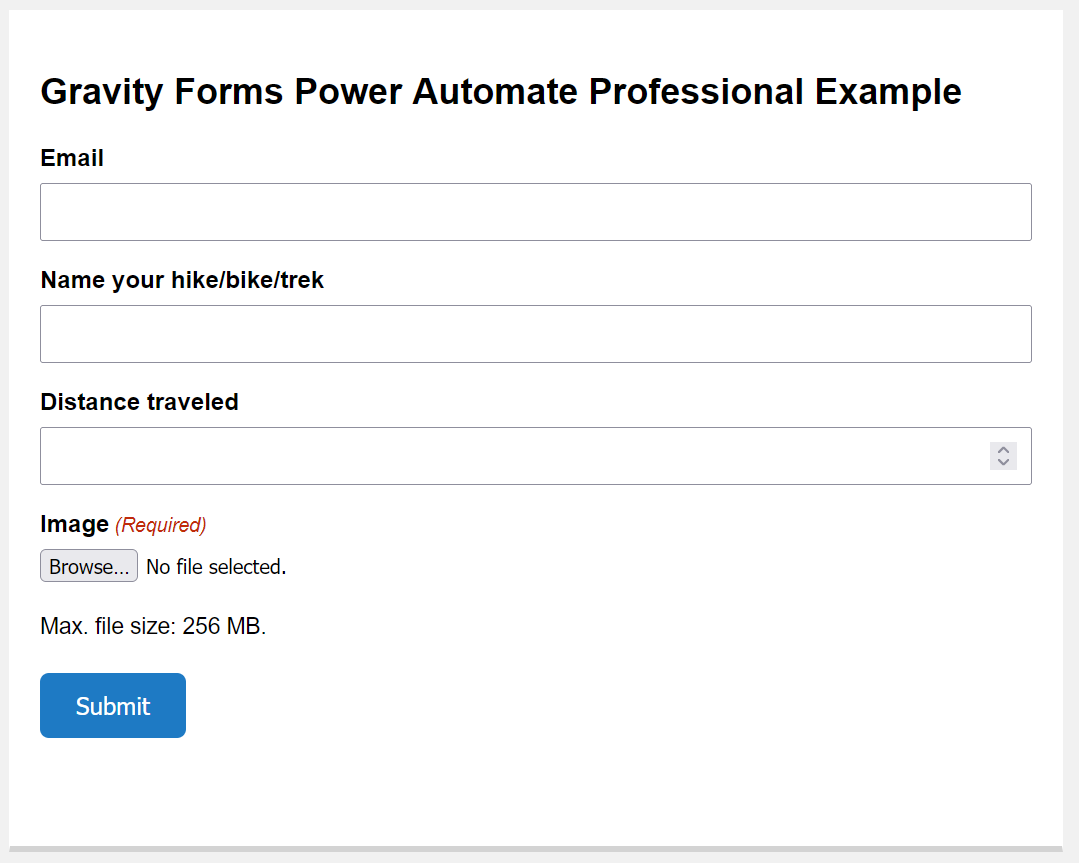
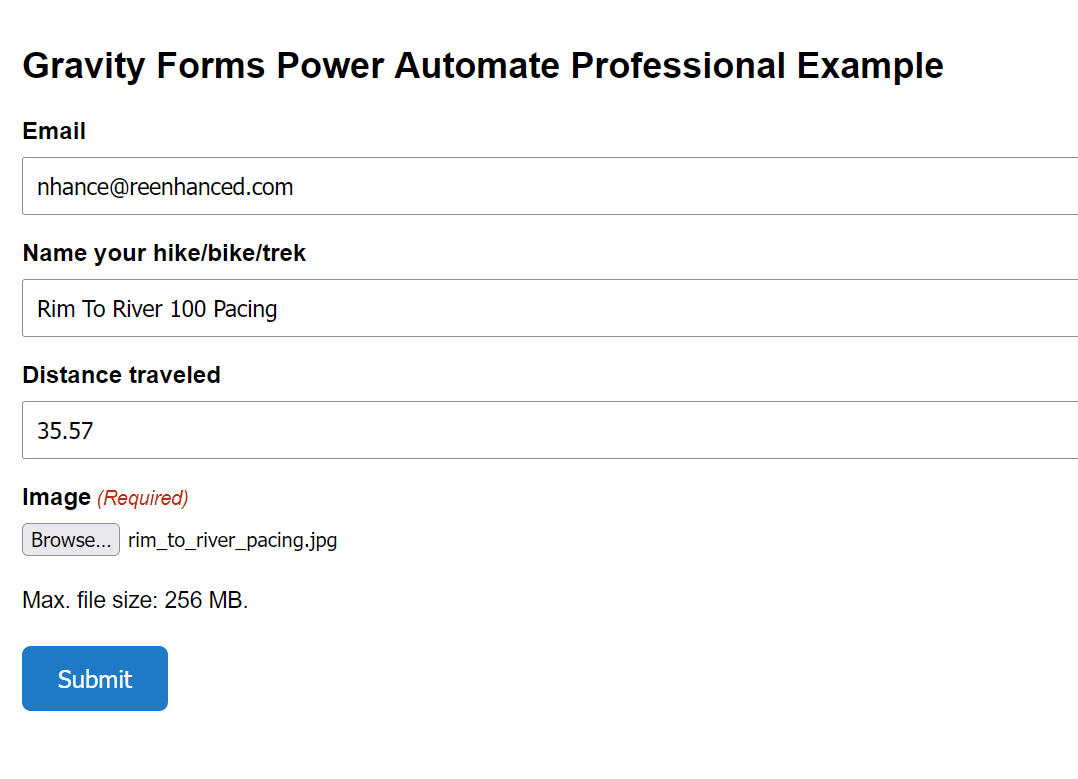
- A Gravity Forms form with a file upload field. The form is called "Gravity Forms Power Automate Professional Example" and has the following fields:
- Email (email)
- Name your hike/bike/run (text)
- Image (file upload)
- Distance Travelled (number)
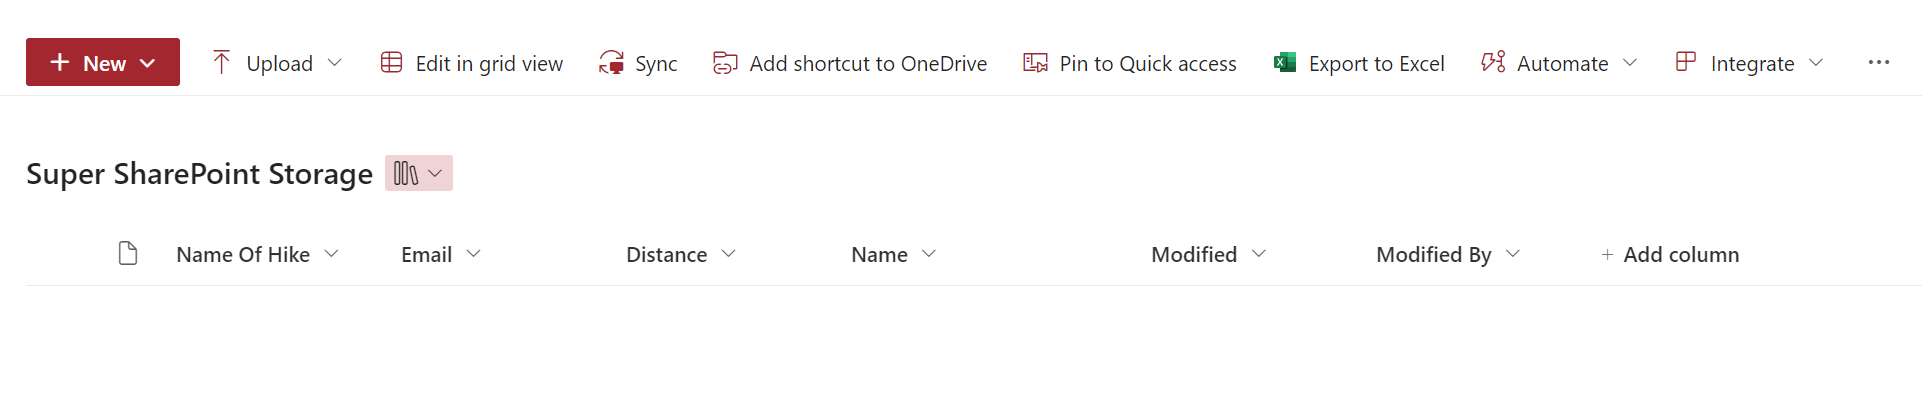
- A SharePoint document library called "Super SharePoint Storage" with the following columns:
- Email (single line of text)
- Name your hike/bike/run (single line of text)
- Image (image)
- Distance Travelled (number)
Our business wants to store the form data in SharePoint and upload the attached file to the SharePoint document library. We'll use Power Automate, like a boss.
Our SharePoint Document Library Looks Like This
Our Gravity Forms Form Looks Like This
Prerequisites
Before you begin, you'll need to have the following:
- A WordPress website
- Power Automate account
- You'll need to have a Power Automate premium plan to use this plugin.
- Many licenses include Power Automate premium, so check with your IT department if you're not sure.
- Gravity Forms version 2.4.0 or above:
- A paid version of Gravity Forms is not required, but is highly recommended.
- The free version of Gravity Forms does not support file uploads, so you won't be able to follow along with the file upload portion of this tutorial.
- SharePoint account
- You'll need to have a SharePoint account to use this tutorial.
- Many licenses include SharePoint, so check with your IT department if you're not sure.
- Gravity Forms Power Automate Professional installed on your WordPress site.
- You'll need a valid license key for your flows to work.
- You are reading our documentation now. You're in the right place!
Step 1: Create a new flow and setup your connection

In this step, we will create a new flow and setup the connection to Gravity Forms Power Automate Professional. It all starts with an Automated Cloud Flow:

- Go to Power Automate.
- Click on Create in the left-hand navigation.
- Click on Automated Cloud Flow. Fill in your flow name and select the trigger When a new form is submitted for the Gravity Forms Power Automate Professional connector.
- Since this is your first flow, you will need to setup the connection for the Gravity Forms Power Automate Professional connector. Click on Create to create a new connection.
Setup your connection
When you add the trigger without a connection, you will see the following screen:
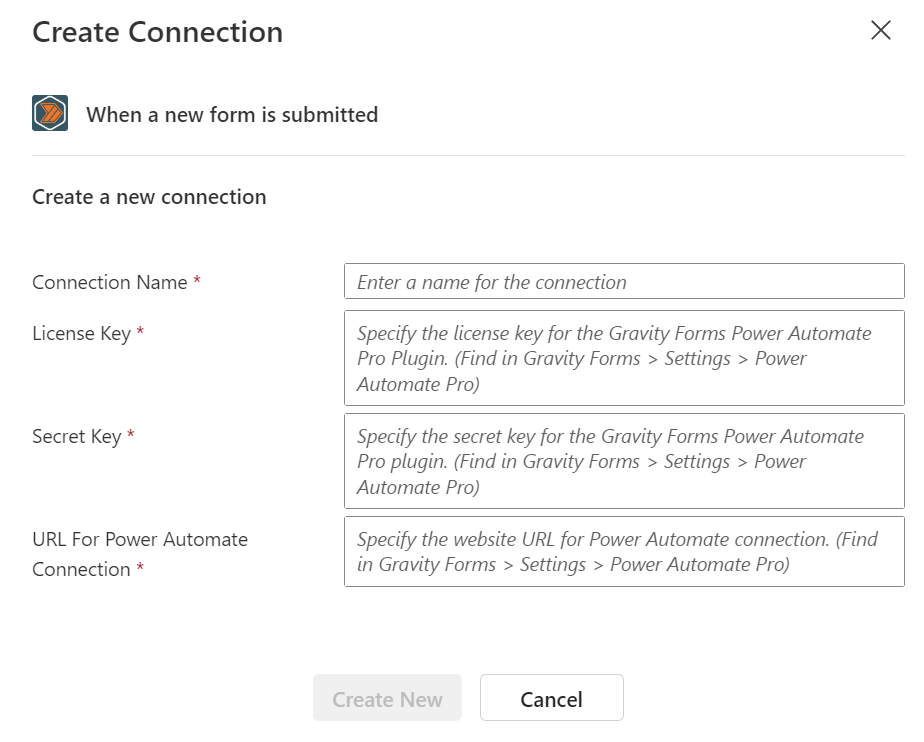
In order to fill out these fields, you can navigate to your Gravity Forms settings (By going to WordPress Administration > Forms > Settings ) and click on the Power Automate Pro tab. You will see the following screen. ( If you don't see Connection Details, try refreshing the page. We assume you've followed all the directions in Installation, right? )
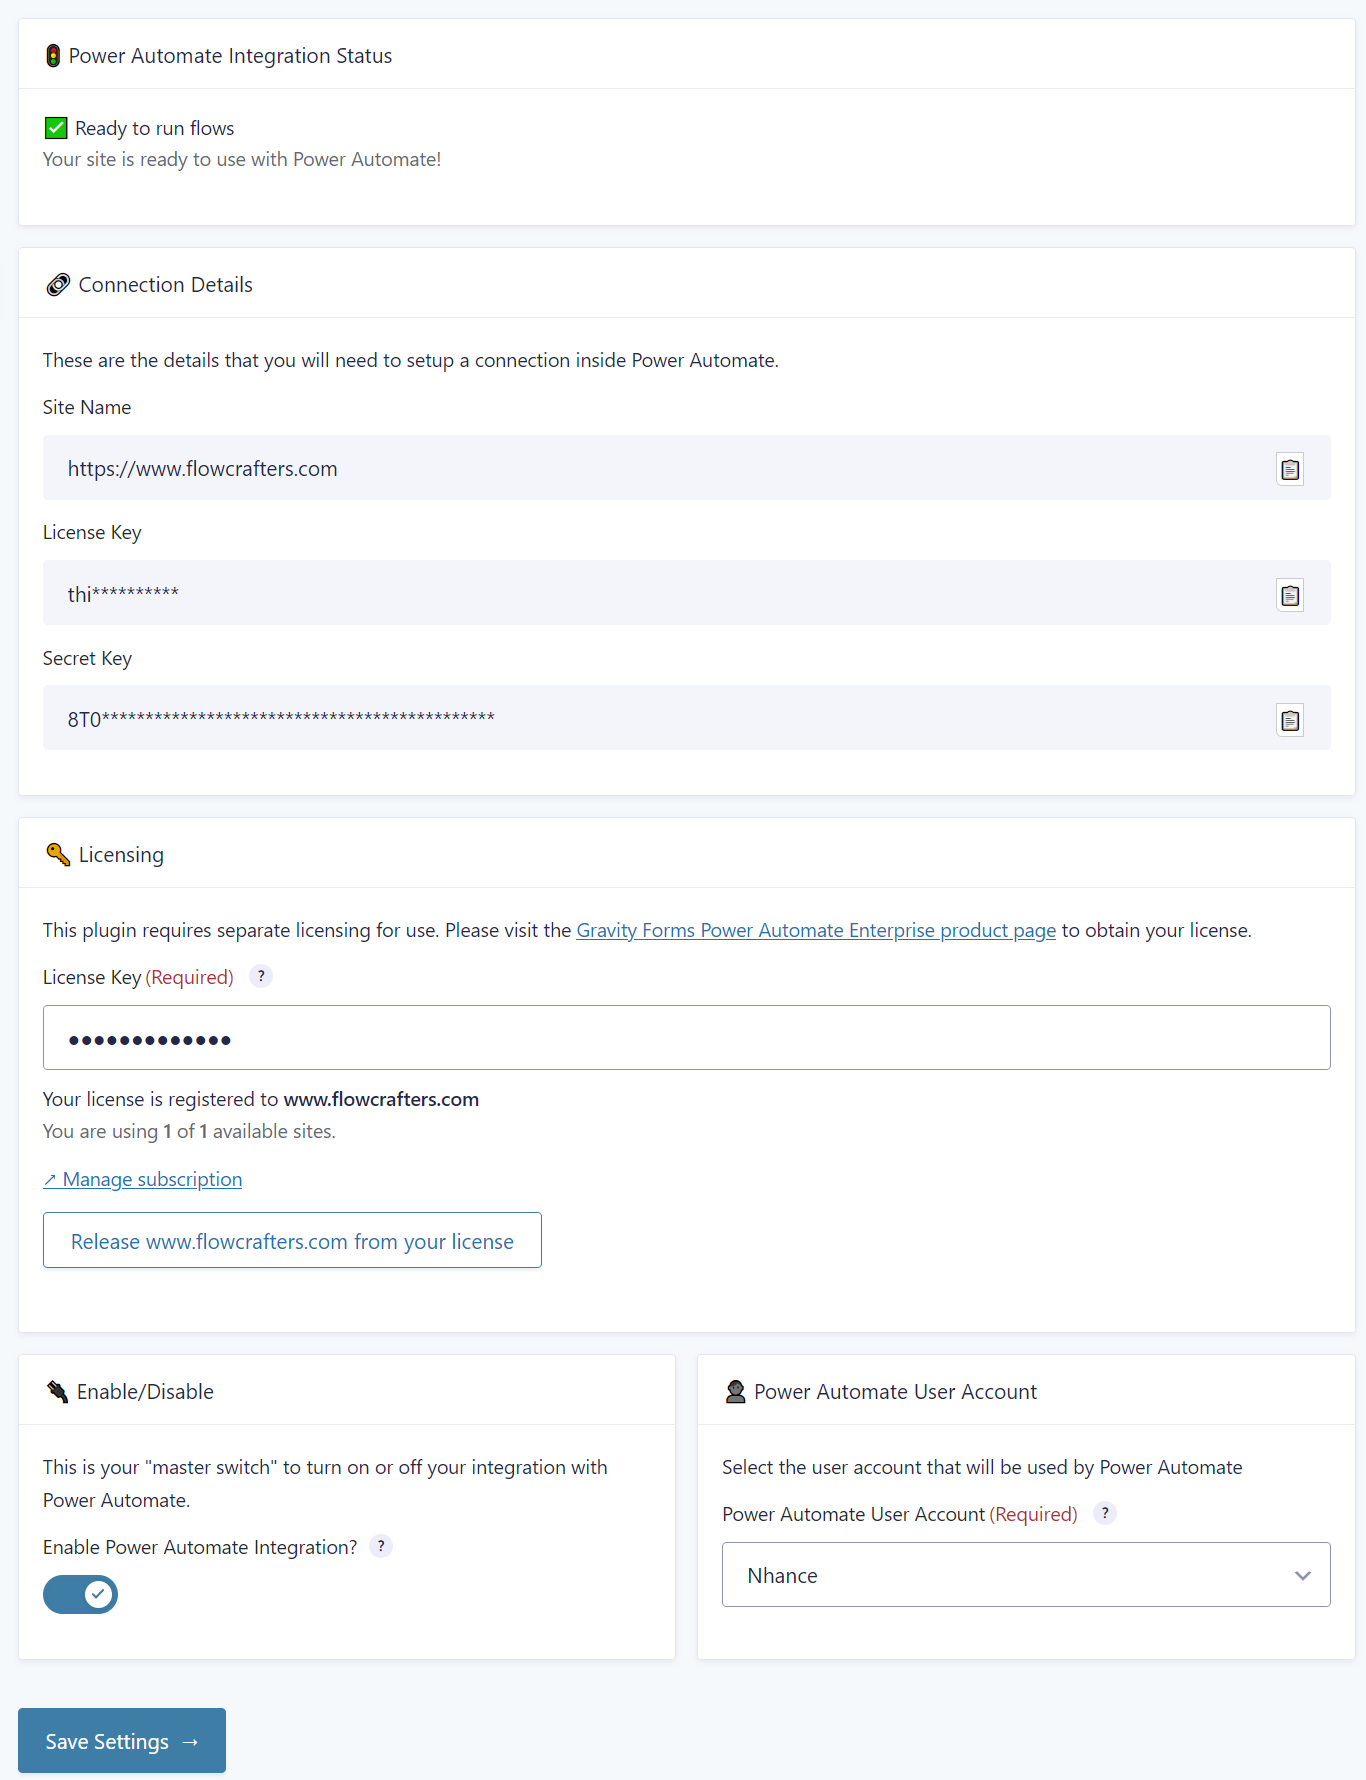
Each of the Site Name, License Key, and Secret Key fields can be found here and you can click on the little clipboard icon 📋 to copy the value to the clipboard. Then go back to the Power Automate Create Connection screen and paste each value into the field.
Once you have filled out the fields, your connection has been setup.
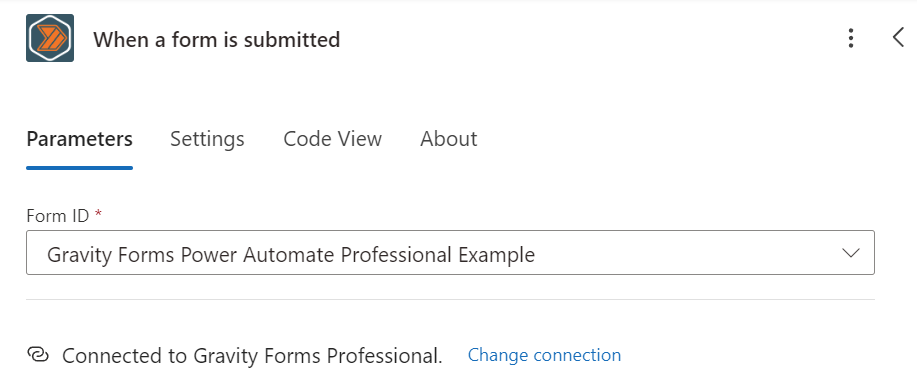
Now, let's select our form in the Form dropdown. You will see a list of all the forms on your site. Select the form you want to use for this flow.
Step 2: Download the file and send the form data to SharePoint
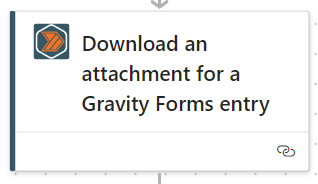
Now that we have our trigger setup, we can add an action to download the file data that we'll send to SharePoint. Click on the little plus icon to add an action.
From the Gravity Forms Professional connector, select the Download an atachment for a Gravity Forms entry action.

Now we need to fill in the Entry ID and Attachment URL fields. Each of these come from data submitted through the trigger. You can click on the Add dynamic content button to see the available fields.
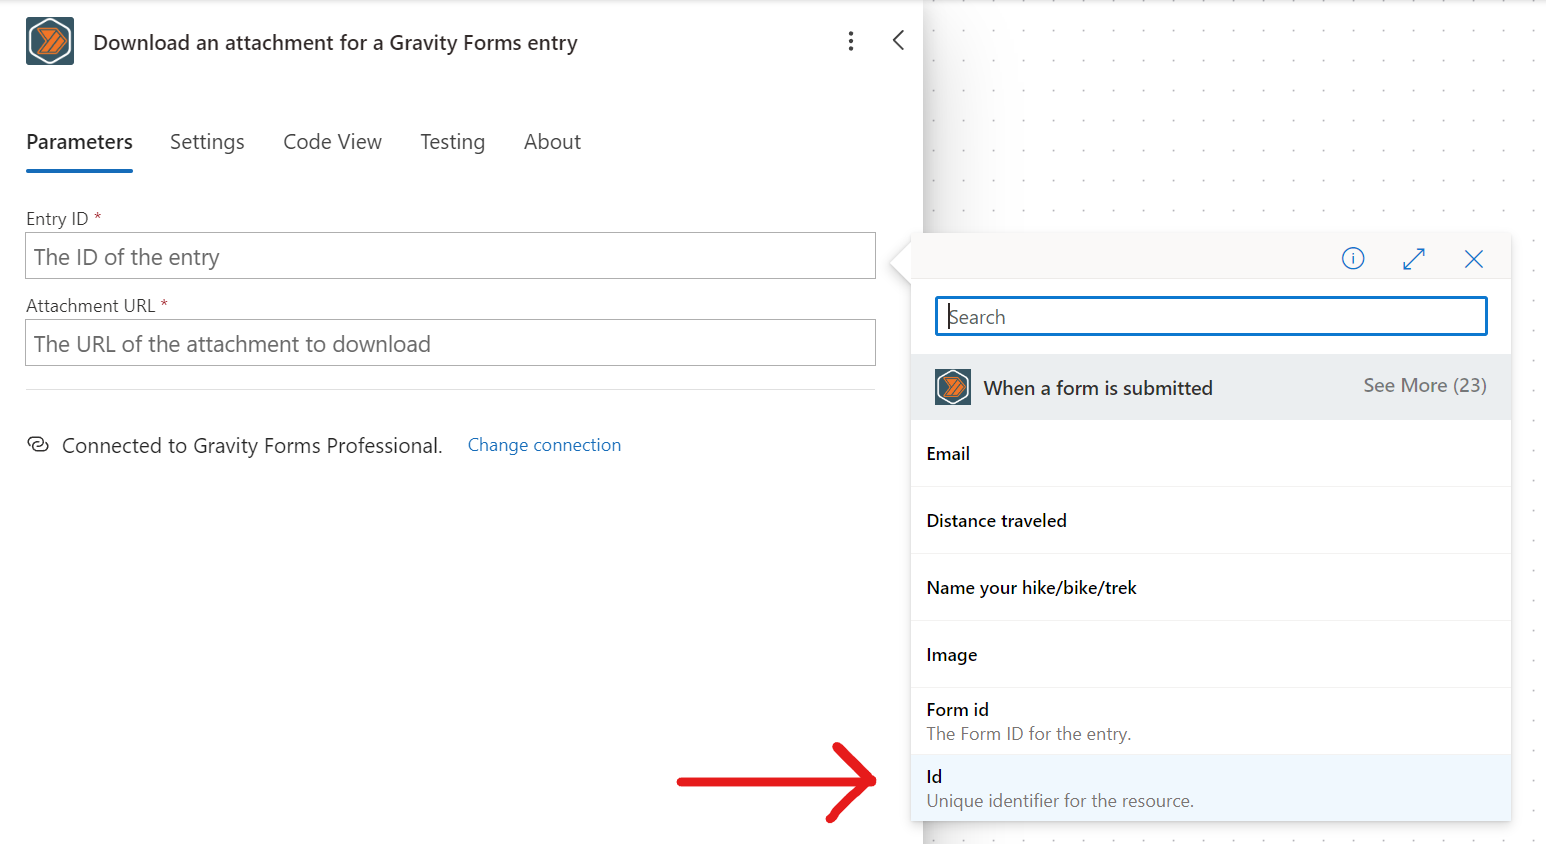 Example: Adding the Entry ID
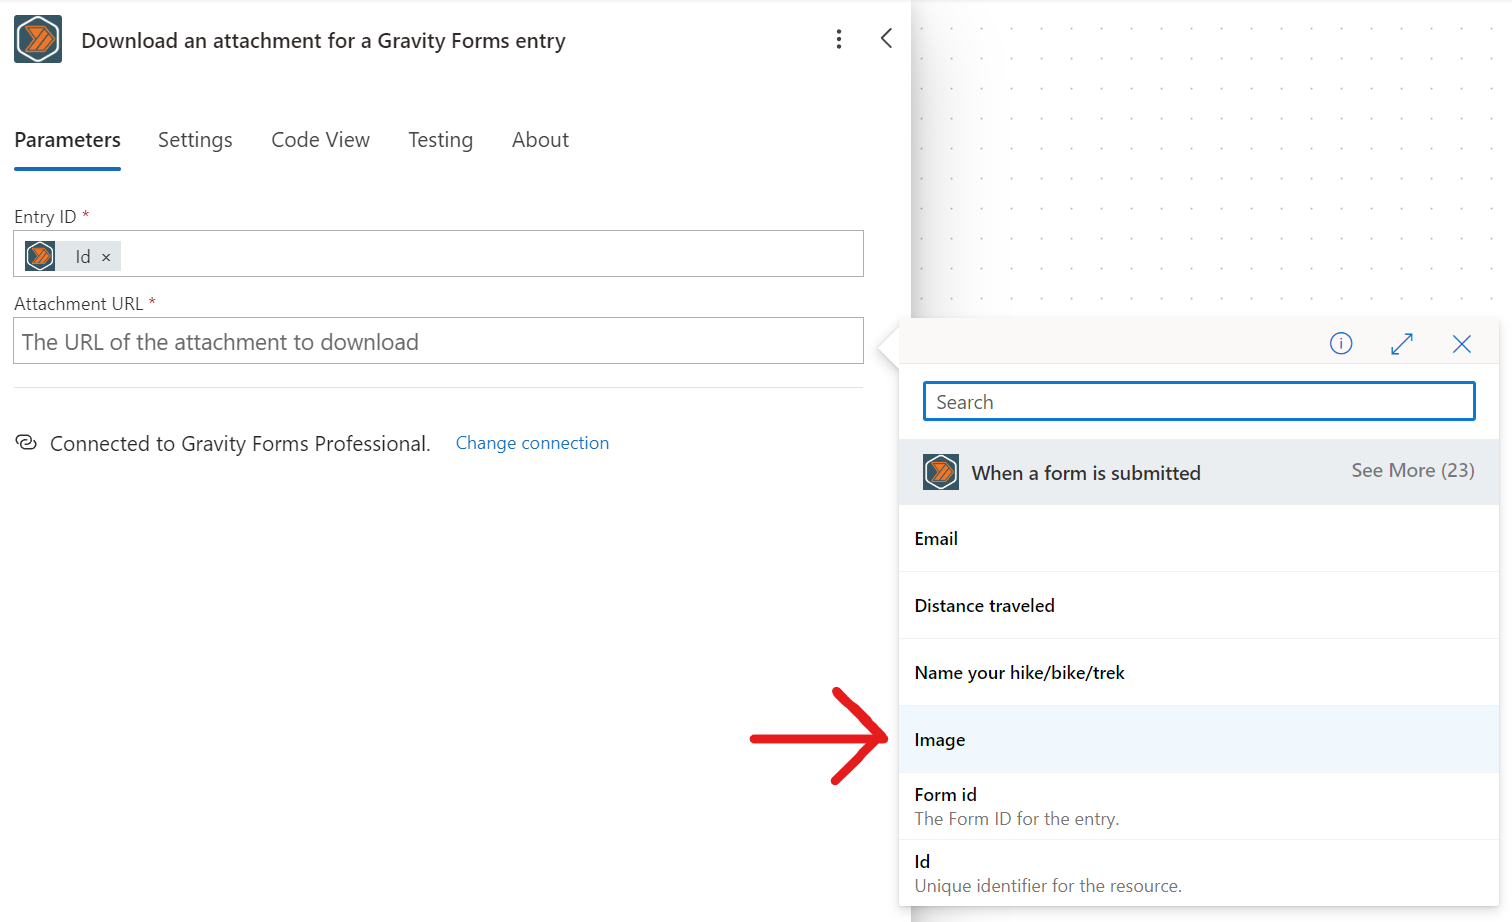 Example: Adding the Attachment URL. The field from Gravity Forms contains a URL. You will see the names of your form fields here, so yours will look different.
Step 3: Upload the file to SharePoint

Now that we have the file contents, we can upload the file to SharePoint. Add a new action and select the SharePoint connector. Then select the Create file action. Fill in the Site Address and Library Name fields.
Then, for the File Name field, select File Name as Dynamic Content from the previous Download action.
Finally, for the File Content field, we need to decode the output from the Download an attachment for a Gravity Forms entry action. We can use the base64ToBinary() function to do this.
Example: Decoding the file content
 Power Automate doesn't really know what you want to do with the file, so you need to tell it to decode the base64 content to binary.
Step 4: Update file properties in SharePoint

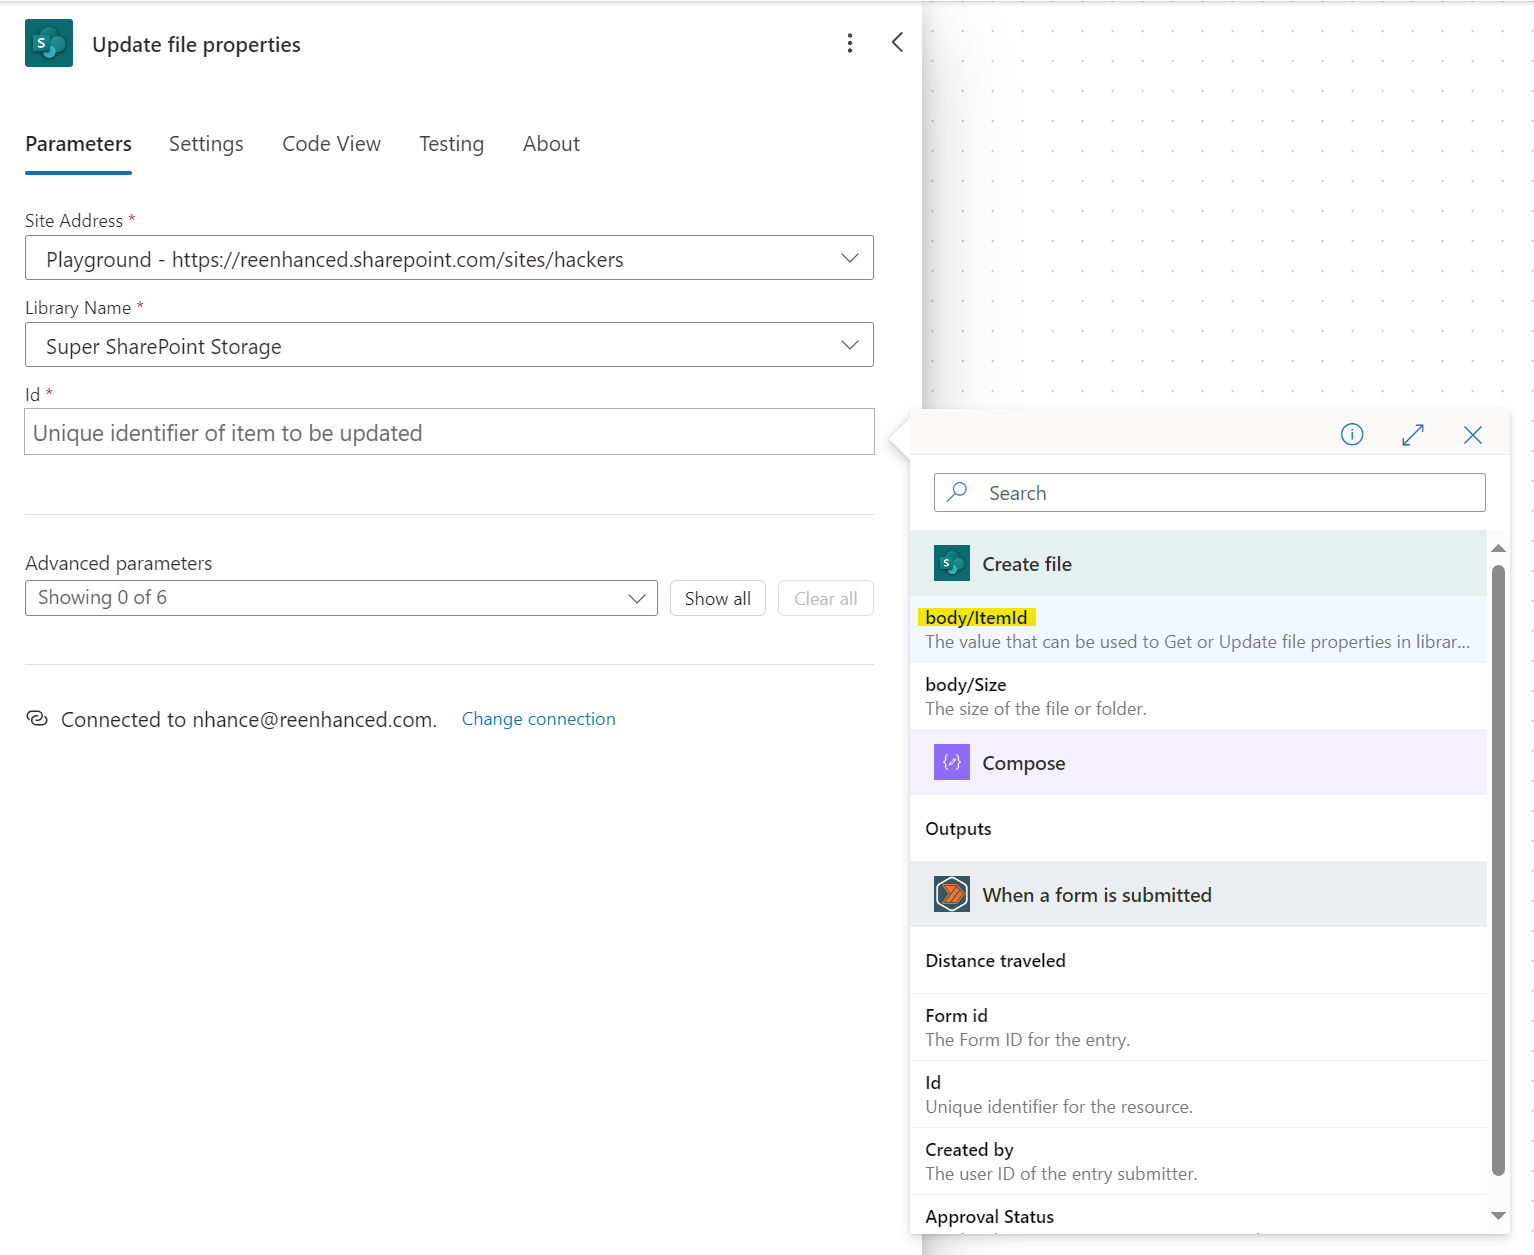
Now that we have uploaded the file to SharePoint, we need to update the file properties. Add a new action and select the SharePoint connector. Then select the Update file properties action. Fill in the Site Address and Library Name fields.
Then, for the File Identifier field, use the File Identifier output from the Create file action.
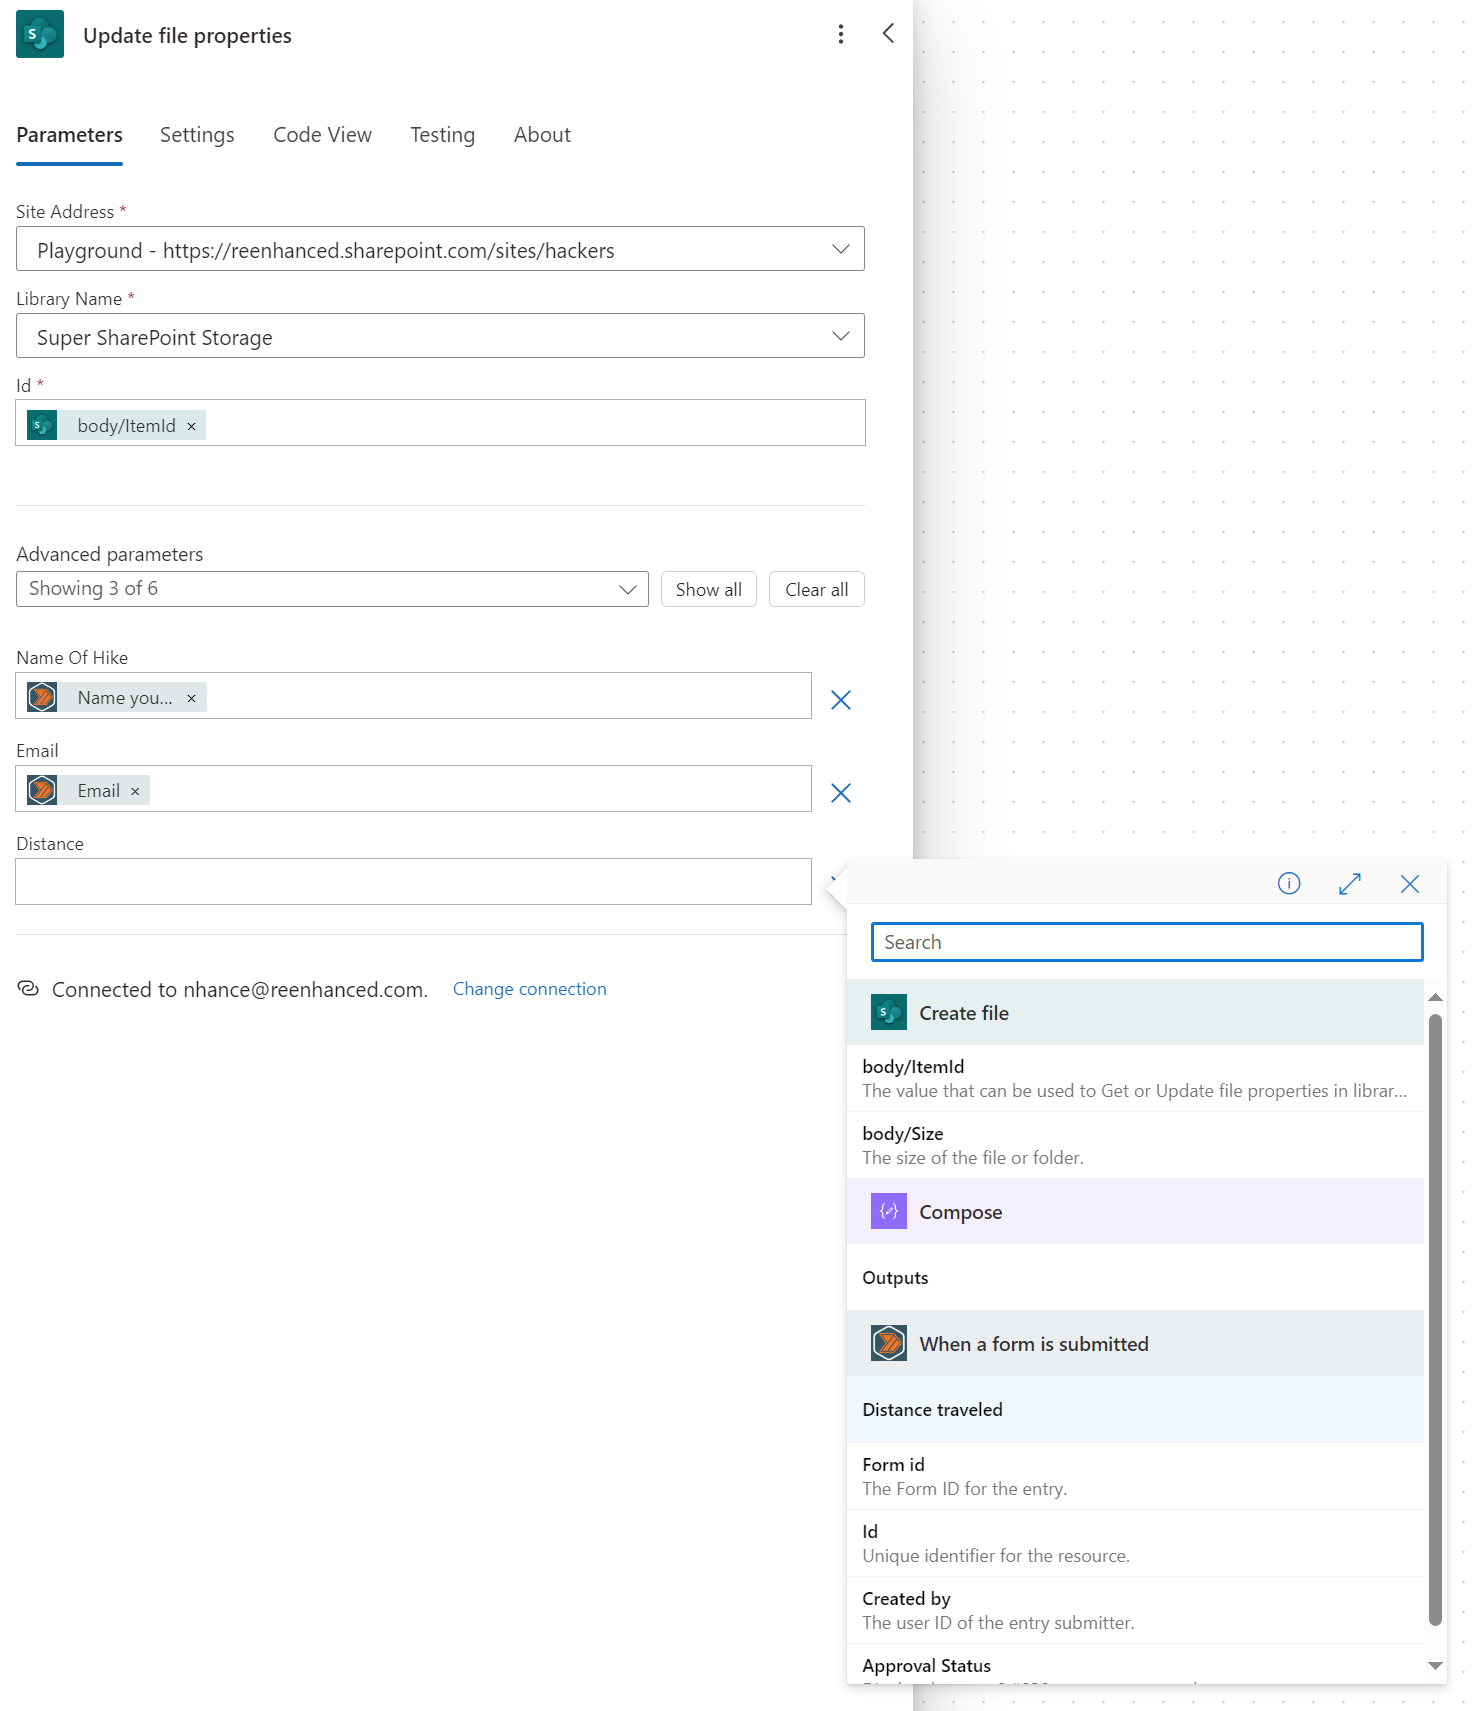
Finally, fill in the File Properties fields with the Dynamic Content from the trigger. (You may need to click the dropdown and select the fields you want to fill.)
That's it! Your flow is ready to test. Click on Save and then Test to test your flow.
Step 6: Test your flow
From the WordPress site, fill out the form and make sure you upload a file:
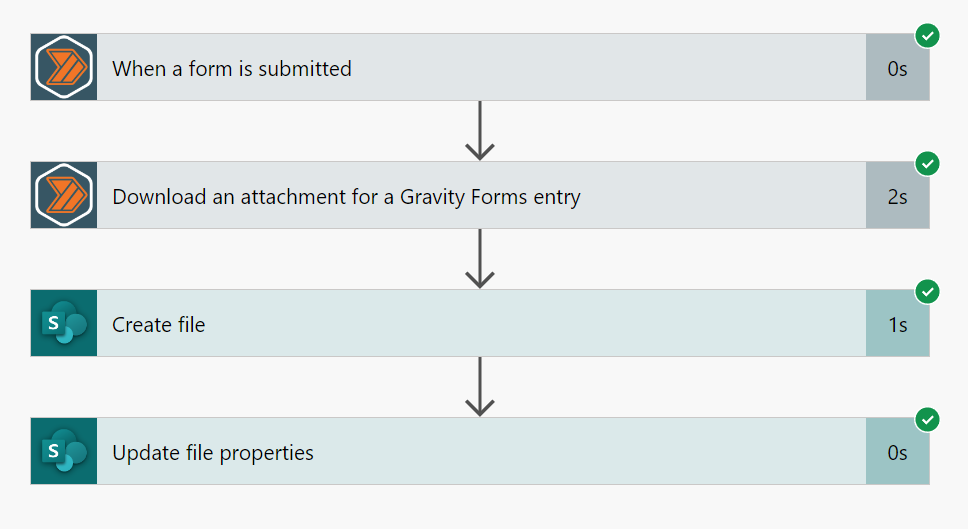
Press submit and you should see the flow run.
When the flow runs successfully, this is what you'll see
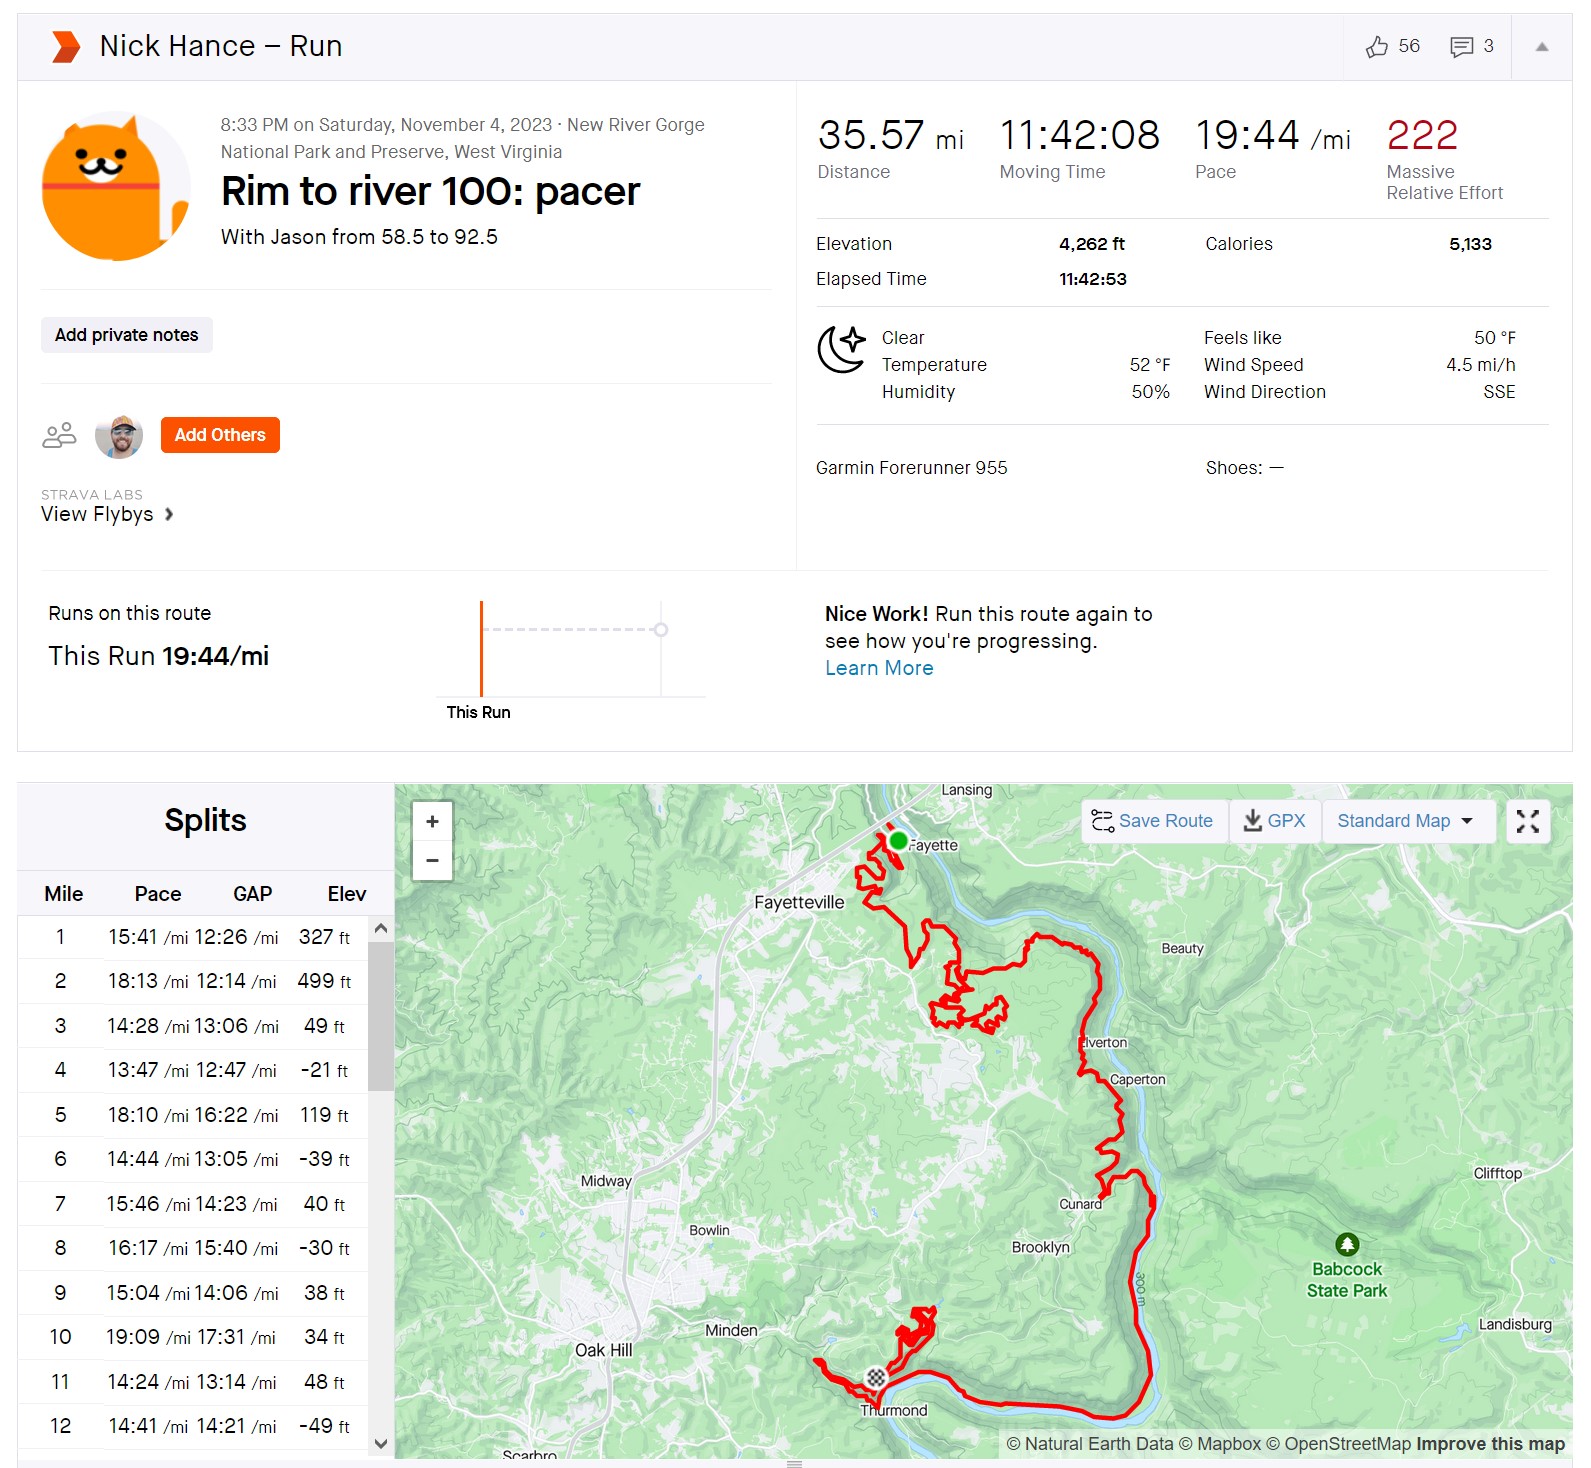
And this is what the SharePoint document library will look like

And if you click on the filename, you can view the file that was uploaded!
You can now use your new skills for ALL THE THINGS! 🚀