Introduction
Gravity Forms Power Automate Professional is a premium add-on for Gravity Forms that allows you to integrate Gravity Forms with over 1000 Microsoft-certified services through Power Automate.
There are no user limits. There are no form limits. There are no page view limits. You can use Gravity Forms Power Automate Professional to automate as many forms as you want, as often as you want, using the WordPress website you already have. Without writing a single line of code.
Let's discover Gravity Forms Power Automate Professional in less than 5 minutes.
Getting Started
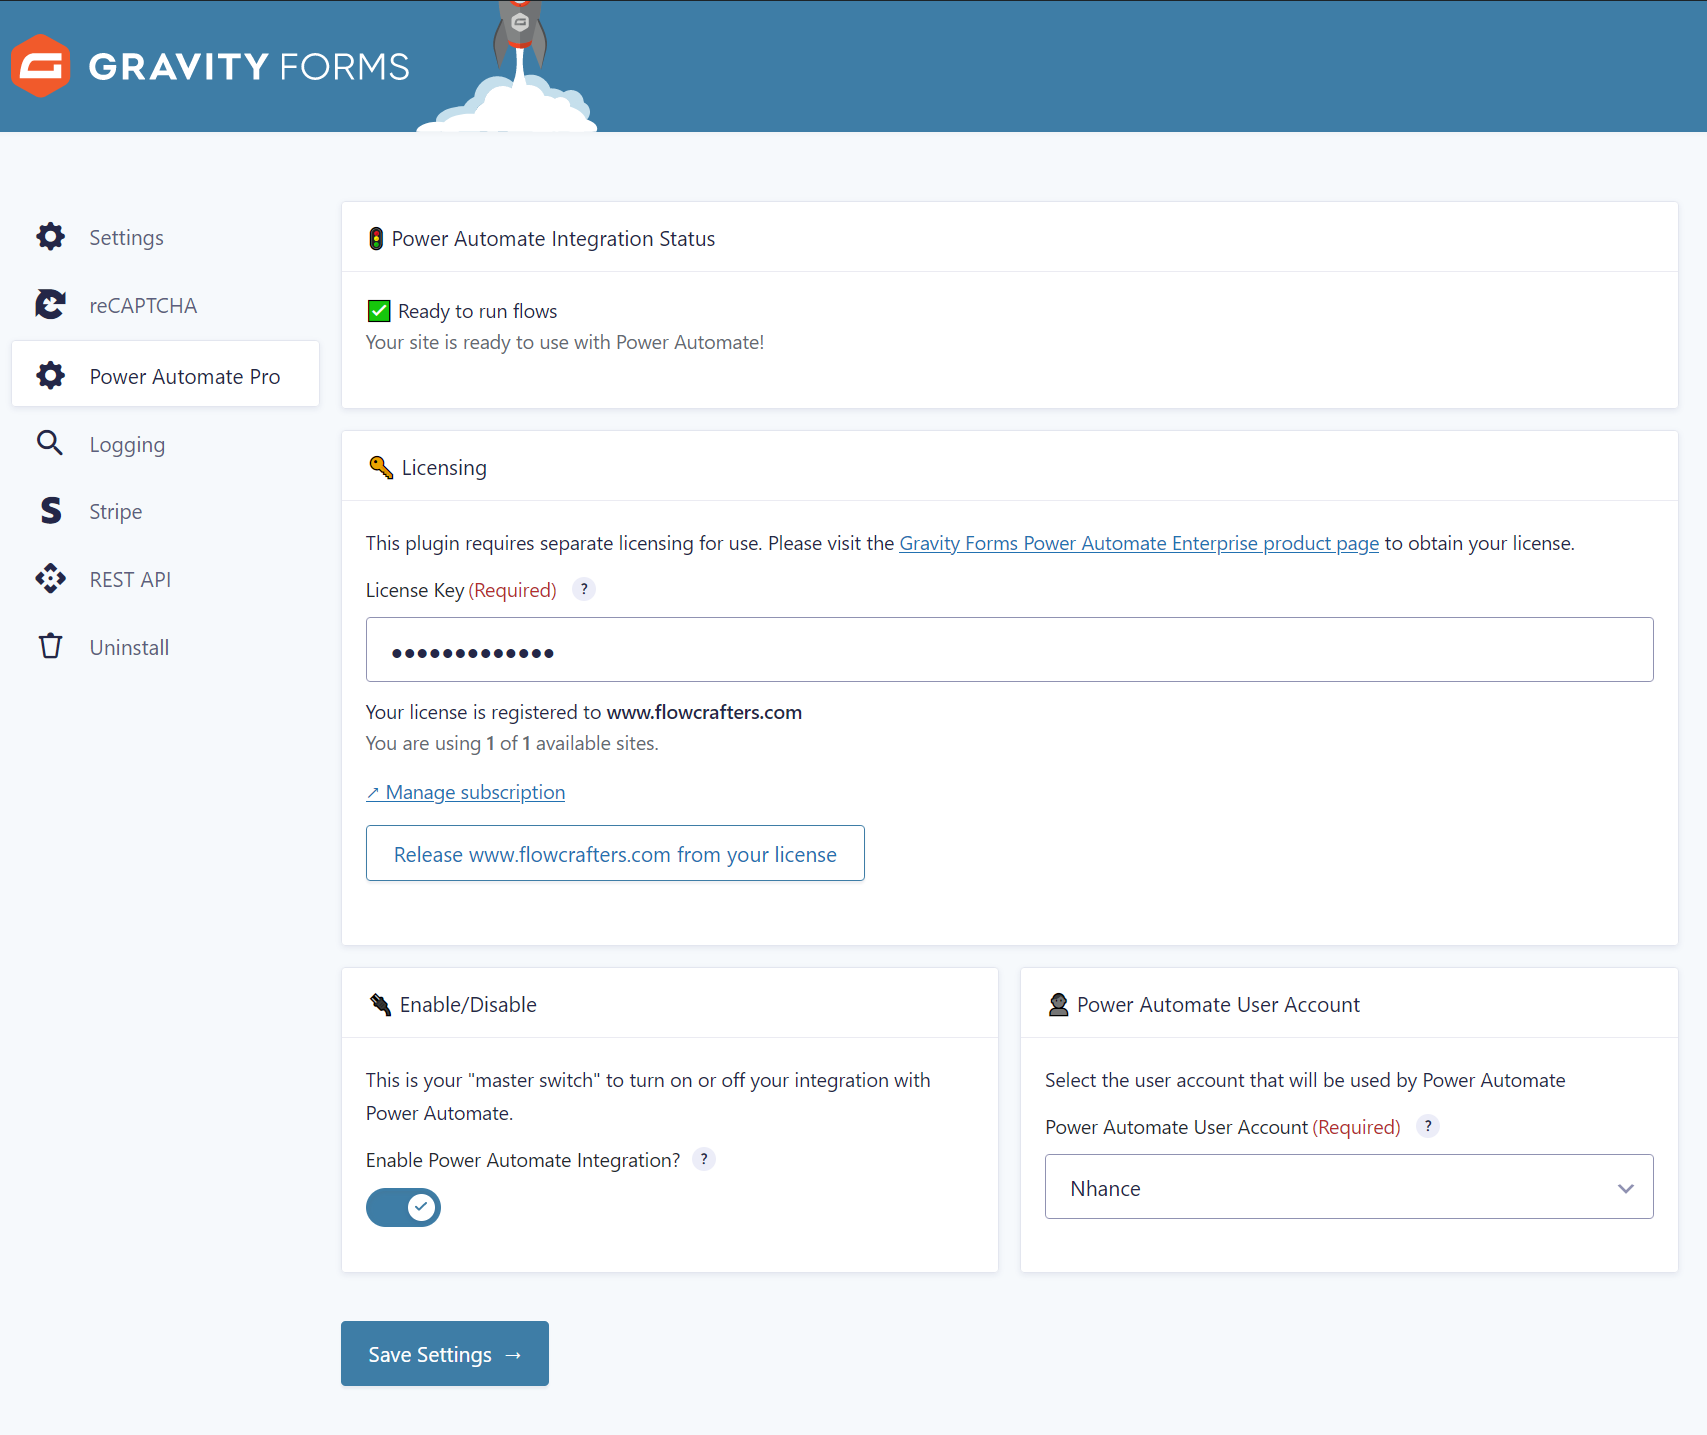
Get started by purchasing and installing the WordPress plugin.
Then, setup a connection inside Power Automate.
What you'll need
- Power Automate account
- Power Automate is a cloud-based service from Microsoft that allows you to automate business processes from over 1000 Microsoft-certified services.
- You'll need to have a Power Automate premium plan to use this plugin.
- Many licenses include Power Automate premium, so check with your IT department if you're not sure.
- WordPress
- WordPress is a free and open-source content management system (CMS) that allows you to create and manage websites.
- It powers over 40% of the web, so you may already be using it.
- Gravity Forms version 2.4.0 or above:
- Gravity Forms is a WordPress plugin that allows you to build and manage forms on your website.
- A paid version of Gravity Forms is not required, but is highly recommended.
- Gravity View (Optional)
- Gravity View is a premium plugin for Gravity Forms that allows you to display form entries on your website.
- If you want to display form entries to website visitor or users, you'll want to use Gravity View.
- Gravity PDF (Optional)
- Gravity PDF is a free plugin for Gravity Forms that allows you to generate PDFs from form entries.
- If you want to convert form entries to PDFs or use your forms to fill in PDF templates, you'll want Gravity PDF.
What you get with Gravity Forms Power Automate Professional
Gravity Forms Power Automate Professional provides you with unique and powerful features to integrate Gravity Forms with Power Automate. You can use these features to automate your business processes, save time, and reduce errors.
Examples of what you can do
- Build a custom approval workflow: Create a custom approval workflow for your forms, integrated with the team you already have set up.
- Build a customer facing portal: Create a customer-facing portal where customers can submit and edit forms, and you can manage them in your CRM. Without using a single line of code.
- Build a document generation system: Automatically generate documents from form entries and save them to SharePoint, OneDrive, or other file storage systems.
- Build a legally binding e-signature system: Create a legally binding e-signature system and then integrate it with your CRM, ERP, or other business systems.
- Automate data entry: Automatically enter form data into your CRM, ERP, or other business systems.
- Automate file management: Automatically save files uploaded to your forms to SharePoint, OneDrive, or other file storage systems.
- Automate notifications: Automatically send notifications to Teams when a form is submitted, updated, or deleted.
- Automate data validation: Automatically validate form entries and send notifications when there are errors.
- Automate data cleanup: Automatically delete form entries after a certain period of time, or after processing.
Features
- Trigger on Form Submission: Trigger a flow when a form is submitted.
- Trigger on Entry Update: Trigger a flow when a form entry is updated.
- Trigger on Entry Status Update: Trigger a flow when a form entry status is updated.
- Trigger on Entry Deletion: Trigger a flow when a form entry is deleted.
- Trigger on Note Added: Trigger a flow when a note is added to a form entry.
- Create Entry: Create a form entry from a flow.
- Validate Entry: Validate a form entry from a flow.
- Update Entry: Update a form entry from a flow.
- Delete Entry: Delete a form entry from a flow.
- Add Note: Add a note to a form entry from a flow.
- Download File: Download a file from a form entry from a flow.
- Delete File: Delete a file from a form entry from a flow.
For a full list of triggers and actions, see the navigation sidebar.
Example flow
Learn how to build a flow that receives a form submission from a website visitor and stores the submitted file and data in a SharePoint document library.