Installation
After purchase
After purchasing Gravity Forms Power Automate Professional, you will receive:
- An email containing your license key. This is also attached as a note on your subscription.
- A link to download the WordPress plugin as a .zip file.
Installing into your WordPress site
Below are detailed instructions on how to install a WordPress plugin from a ZIP file:
Method 1: Install via WordPress Dashboard (Easy/Beginner)
- Log in to your WordPress admin dashboard.
- Navigate to the Plugins section on the left menu and click on "Add New."
- Click on the "Upload Plugin" button at the top of the page.
- Choose the plugin ZIP file you downloaded earlier (e.g., "gravity-forms-power-automate-pro.zip") and click "Install Now."
- After installation, click "Activate" to enable the plugin.
- Your plugin is now installed and ready to use. Some plugins may have additional settings accessible via a new menu item in your dashboard.
Method 2: Install via SFTP (Intermediate)
- Download the plugin ZIP file (in this case, "gravity-forms-power-automate-pro.zip") to your computer.
- Unzip the file.
- Use an FTP client (such as FileZilla) to connect to your WordPress site.
- Navigate to the
/public/wp-content/pluginsdirectory. - Upload the unzipped plugin folder (e.g., "gravity-forms-power-automate-pro") to this directory.
- Go to the "Installed Plugins" section in your WordPress dashboard and click "Activate" for the newly uploaded plugin.
Method 3: Install via WP-CLI (Advanced)
- Open your command-line interface (e.g., Terminal or Command Prompt).
- Navigate to your WordPress root directory.
- Run the following command to install the plugin:
wp plugin install path/to/gravity-forms-power-automate-pro.zip
- Activate the plugin using:
wp plugin activate gravity-forms-power-automate-pro
Remember to replace "path/to/gravity-forms-power-automate-pro.zip" with the actual path to your downloaded ZIP file. Enjoy using your new plugin! 🎉
Configuration
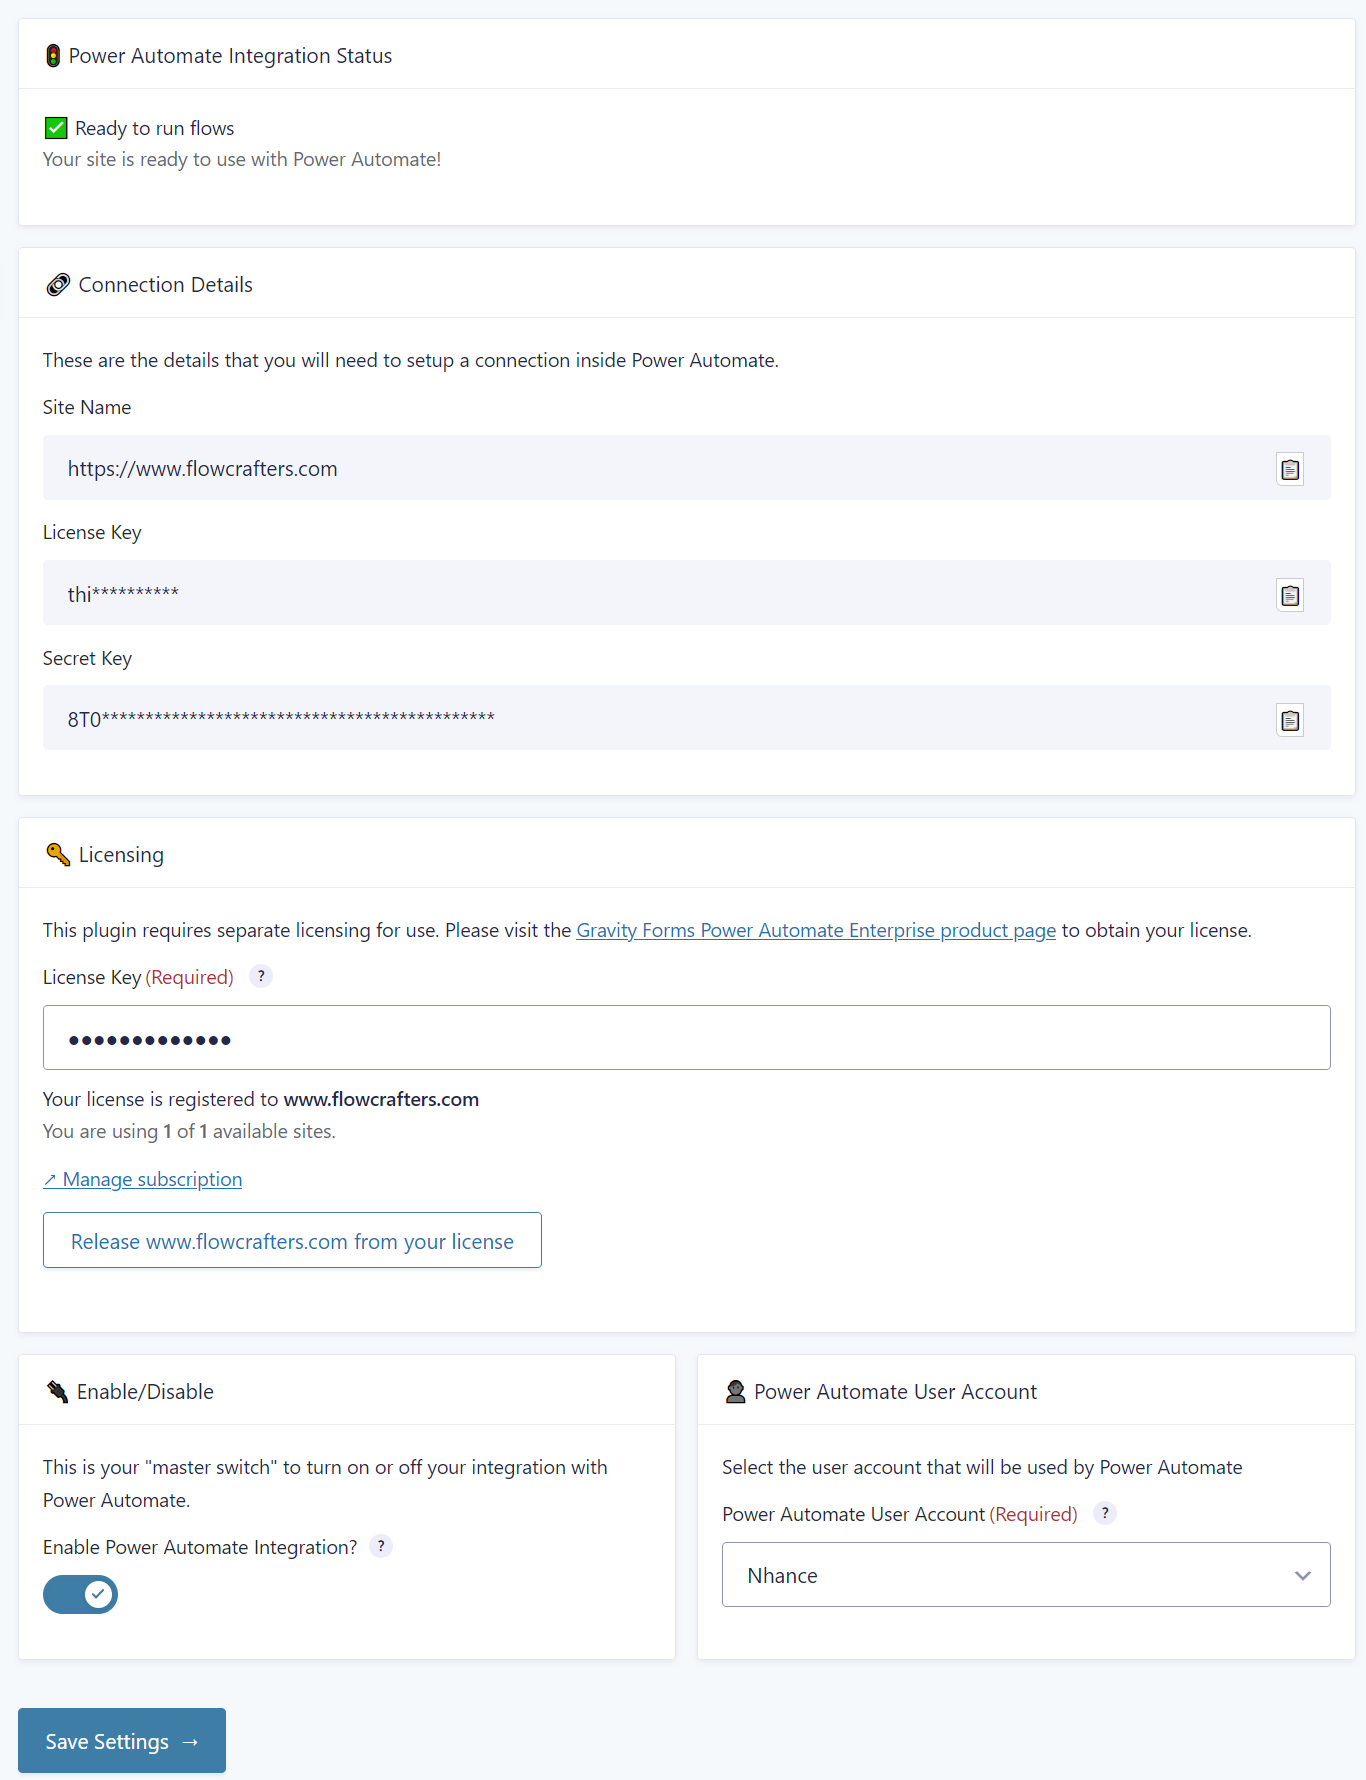
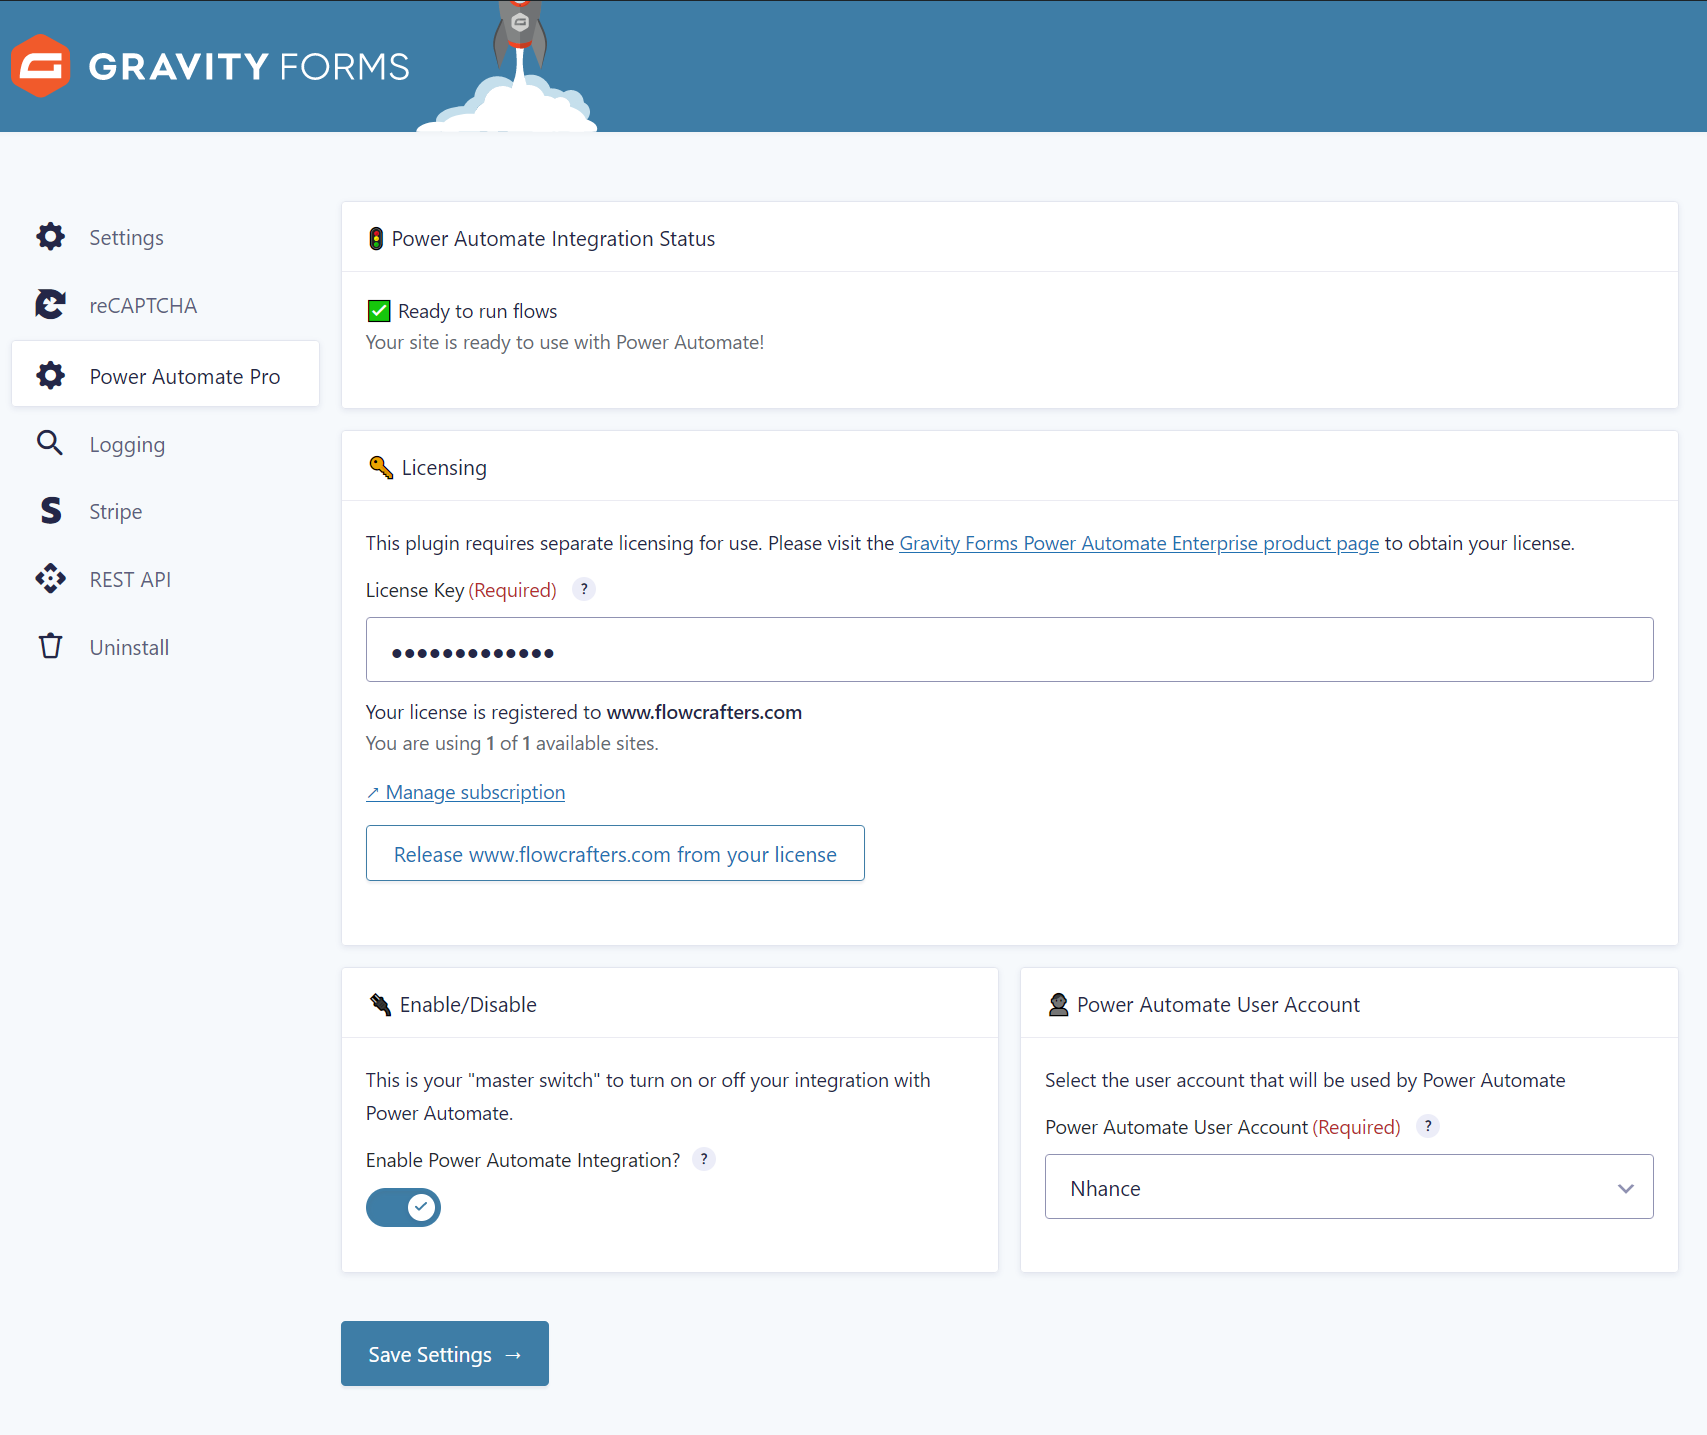
Inside Gravity Forms Settings
- Navigate to WordPress Admin > Forms > Settings > Power Automate Pro
- Enter your license key and select what user account will be used for the Power Automate connection. (You can apply security restrictions to the selected user to limit what Power Automate can access.)
- Press Save Settings and reload the page.
After you reload the page, you will see a new section on the Gravity Forms settings showing the following:
- URL For Power Automate Connection
- This is the URL for your WordPress website and will be used by Power Automate to connect. In order for you to use the plugin, Power Automate must be able to reach your WordPress website via this URL.
- License Key
- The license key is necessary for your connection configuration inside Power Automate. It is validated on the Power Automate side.
- Secret Key
- The secret key is a randomly generated string that is unique to your WordPress site. It secures the connection between Power Automate and Gravity Forms and assures that no one can access your information if your license key is disclosed.
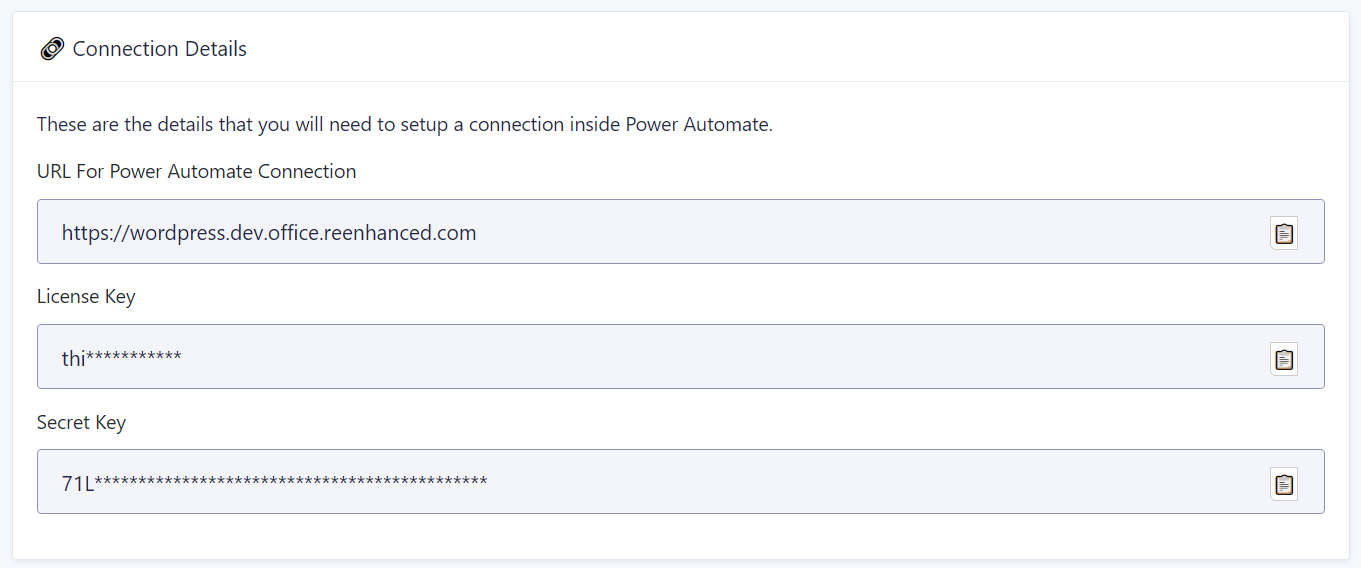 The Connection Details section appears after you save your settings and reload.
Setting up a connection in Power Automate
Use the information above when you setup a connection to Gravity Forms in Power Automate.
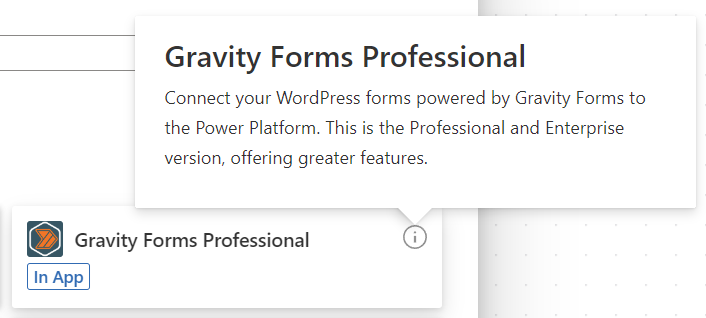
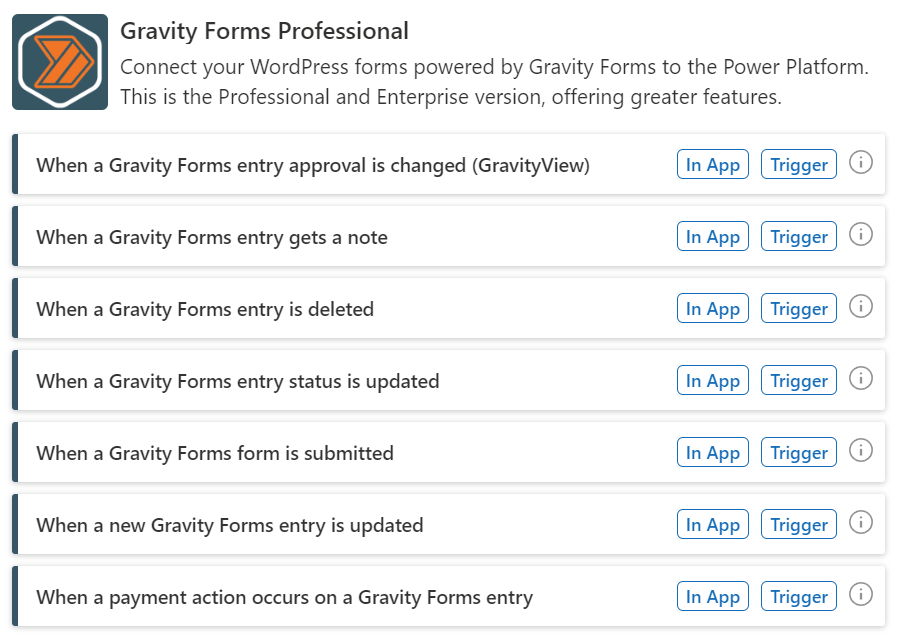
First, select the Gravity Forms Professional connector:
Then, choose from the list of available triggers and actions:
When you are prompted to connect to your WordPress site, use the information from the Connection Details section in the Gravity Forms settings:
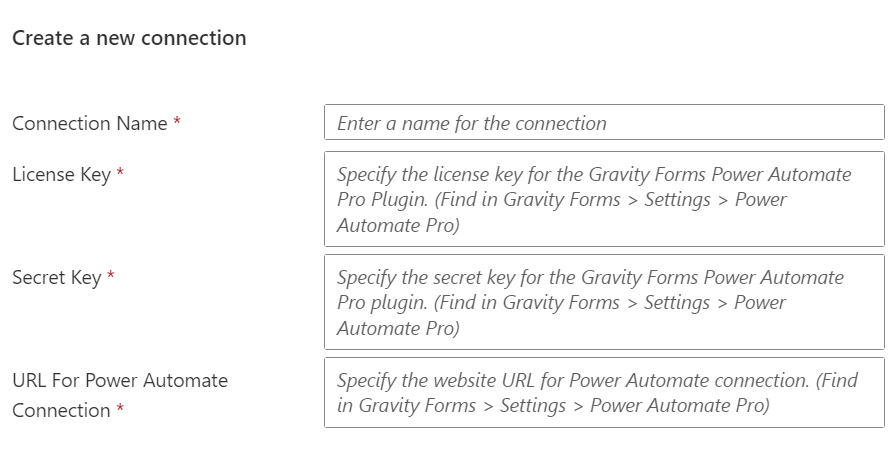
You can press the little clipboard icon 📋 from the WordPress Power Automate Settings page to copy each value to the clipboard.
Visit the Settings for Gravity Forms Power Automate Professional on your WordPress site to get these values for setting up your connection.
Press the Create New button and your connection will be established.
Each trigger and action will have its own configuration options. You can find more information about each trigger and action in the documentation for each here.